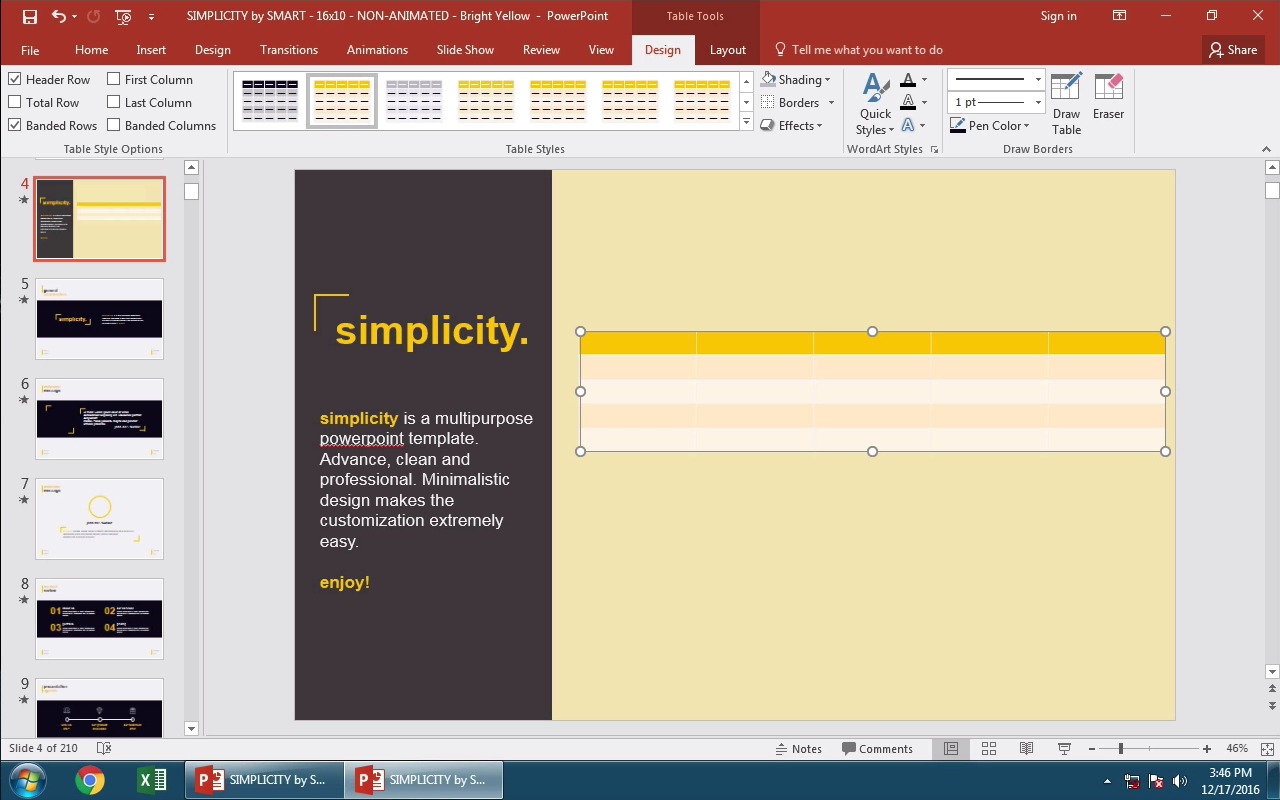
How to Add a Table to PowerPoint in 60 Seconds
Tables are an essential way to organize and present data in Microsoft PowerPoint. Let's look at how to add tables in PowerPoint with this quick tutorial.
We also have a helpful compliment to this tutorial. Download our FREE eBook: The Complete Guide to Making Great Presentations. Grab it now before you read on.


Note: In todays tutorial, we make use of the popular Simplicity PowerPoint Template. You can also find more professional PowerPoint templates on GraphicRiver.
How to Add Tables in Your PowerPoint Presentations (Quick Video)

1. Insert a Table into PowerPoint
Find the Insert tab at the top of the application. On the left side, click on Table to get started. Once I do this it will go ahead in drop-down and we can select how many rows and columns we want the table to contain.


2. Type in Cells to Adjust Your Table
As I hover over the possible grid, PowerPoint will show the size of the table to be inserted. I'm going to insert a five column by five row table. Don't worry if you need to change this and adjust later.
Now that the table is in PowerPoint, I can click in a cell and type what I want to show in the cell.


3. Use Layout to Add More Rows or Columns
If I need to add another row or column, I can just click the Layout tab here at the top of PowerPoint. These four buttons allow us to insert a new row or column. I can click Insert Right to insert a new column to the right of where I've selected or Insert Left for a new column to the left of my selection.
I can click Insert Below to add a new row below or Insert Above for a new row just above where my cursor is.


Finishing Up!
Working with tables in PowerPoint is quick and offers good flexibility for presenting your data with.
Quick PowerPoint Videos (60 Second Tutorials)
Learn PowerPoint tools quickly and start stacking up your presentation knowledge. Here are additional PowerPoint tutorials here on Tuts+:


 How to Use PowerPoint Slide Master View in 60 Seconds

 Andrew Childress26 Dec 2016

 How to Download, Import, & Install a PowerPoint Template

 Sarah Joy21 Jan 2023
Discover more great PPT design options in our Ultimate Guide to PowerPoint Templates.
Make Great Presentations (Free PDF eBook Download)


We have the perfect compliment to this tutorial, which will walk you through the complete presentation process. Learn how to write your presentation, design it like a pro, and prepare it to present powerfully.
Download our new eBook: The Complete Guide to Making Great Presentations. It's available for free with a subscription to the Tuts+ Business Newsletter.


