

Like many small business owners, a great deal of your work probably comes to you through your inbox. Following up on your email tasks in Gmail means staying on top of your workload. Even more importantly, it could mean the difference between getting business or losing business.
On any given workday, a business owner may receive email messages from:
- potential new clients
- existing clients with questions
- vendors or colleagues with questions
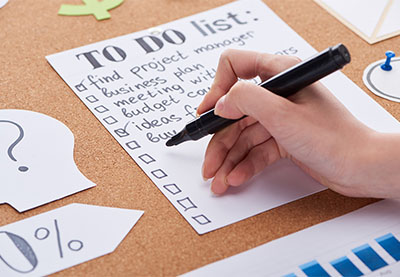
As a business owner, somehow you need to stay caught up with all the tasks generated through your Gmail messages. Wouldn't it be great if you could just dump your to do list into your inbox?
With Gmail, you can integrate your messages with a task list and improve your Gmail productivity. In this tutorial, I'll explain why a task list is important. I'll show you how to create and edit tasks using Gmail's task list. I'll also show you how to use the Gmail Task List on Google Calendar.
Why a Task List Is Important
Keeping a task list can make a big difference in your productivity. A task list helps you stay on track. Here are some concrete benefits to using a task list:
- Keeps you from forgetting to do something
- Helps you organize your work day
- Allows you to see remaining work at a glance
- Lets you see what you've already accomplished
People who use task lists tend to spend more time working towards their goals and waste less time. In general, they are more productive. Learn more about effective productivity techniques—to help you keep on top of your to-do list:


Gmail has the perfect tool to help you create and maintain a
to do list, which is the Gmail Task Lists tool.
If you want to use Gmail to manage your tasks, the Gmail task list tool is for you. Here is step-by-step guide on how to get the most from tasks in Gmail, (beginning with a quick video overview, before jumping into the written tutorial).

1. Create and Edit Tasks Using Gmail's Task List Tool
To start using the Gmail task list, you need to be able to create and edit tasks.
Step 1 How to Create a New Gmail Task
Start from the main Gmail Screen.
.jpg)
.jpg)
.jpg)
Click the red arrow next to the word Gmail. A Drop-down menu displays.
.jpg)
.jpg)
.jpg)
Click Tasks to open your Gmail task list. Your task list appears in the lower right hand corner of the Gmail screen.
.jpg)
.jpg)
.jpg)
To create your task, type the name of the task next to the first check box. You've just created your first task.
.jpg)
.jpg)
.jpg)
Type the name of the task next to the check box.
To add another task, click below the first task. Another check box appears. You can add a task to the second check box by typing the name of the task. (You could also use the plus symbol at the bottom of the Gmail task list.)
Repeat the process as often as you need to complete your email task list.
Step 2. How to Add Details to a Task
Now that you've created a task, you may wish to
add notes or other details to it. To display the Details dialog box, click the arrow
to the right of the task.The Details dialog box appears.
.jpg)
.jpg)
.jpg)
From the Details dialog box you can:
- Assign a due date to your task
- Input notes about your task
- Move tasks to different task lists
I'll explain how to perform the first two tasks in this step. We'll discuss how to move a task in a later step.
1. Assign a Due Date
Let's start by assigning a due date. Click in the Due date field. A calendar displays.
.jpg)
.jpg)
.jpg)
To assign a due date, click on the date in the calendar.
2. Add a Note
To add a note to the task, click in the Notes field and type your note text.
.jpg)
.jpg)
.jpg)
You've just added a due date and a note to a Gmail task. The information you added displays below the task on your checklist.
Now let's review the process to edit Gmail tasks.
Step 3. How to Edit a Gmail Task
Once you've created a few tasks, you may wish to edit the task and its details. Fortunately, the editing process is simple. With the task list open, open the Details dialog box. There are two methods to open the Details dialog box:
- Click the task you wish to edit. Click the arrow to the right of the task to open the Details dialog box.
- Click Actions in the lower left of the task list to open a drop-down menu. Click Edit details to open the Details dialog box.
.jpg)
.jpg)
.jpg)
Once in the Details dialog box opens you can choose another due date from the calendar or type over the task name and notes.
Step 4. How to Remove a Gmail Task
After you complete your Gmail task list, you may decide to remove a task. Perhaps the task is no longer necessary or maybe it wound up on the task list by mistake. Whatever the case, it's not difficult to remove a task.
To remove a task, simply delete it. Or, you can move the task to another task list. I'll show you both methods. Let's start by deleting a task.
1. Deleting a Gmail Task
With your task list open, click the task you wish to remove. Click the trash icon in the lower right of your task list.
.jpg)
.jpg)
.jpg)
The task is deleted.
2. Moving a Gmail Task
Suppose the task was on the wrong list. You can remove a task from your list by assigning it to another list.
Click the task you wish to remove and click the arrow to right of the task. The Details dialog box appears.
.jpg)
.jpg)
.jpg)
Click the Move to list button towards the bottom of the dialog box to see a drop-down menu with your current Gmail task lists.
.jpg)
.jpg)
.jpg)
Click the task list where you want to move the task. In this case, the Groceries list. If the list you select is not currently active, you'll get the following message: "The list "Groceries" is not visible now, so this task will no longer be shown."
2. How to Organize Gmail Task Lists
There are several methods you can use to improve the organization of your Gmail task lists. In this section, I'll discuss:
- How to move a task within a task list
- How to create a sub-task
- How to sort your task list
- How to Print or Email a task list
Step 1. How to Move a Task in Gmail
You can change the order of the tasks in your list. Start with your open Gmail task list. Click the task you want to move. Click the Actions option at the bottom left of the task list. The drop-down menu displays.
.jpg)
.jpg)
.jpg)
To move the task up in your list, click the Move up option. To move the task down in your list, click the Move down option. The selected task moves up or down one item in your task list.
Repeat the process to continue moving the task.
Step 2. How to Create a Sub-task
You can also use indents to create sub-tasks on your Gmail task list. Start with an open task list. Click the task you want to turn into a sub-task.
.jpg)
.jpg)
.jpg)
Click the Actions option at the bottom left of the task list. The drop-down menu displays.
.jpg)
.jpg)
.jpg)
To indent the task in your Gmail task list, click the Indent option. The selected task is indented under the previous task in your task list. In this case, the Run spell check task.
.jpg)
.jpg)
.jpg)
To unindent the task, select the task and click Actions. Then click the Un-indent option from the drop-down menu.
Step 3. How to Sort Gmail Tasks
Sorting tasks on your Gmail task list is a great way to stay organized. Gmail lets you automatically sort your tasks three ways:
- Your order. The order you created the tasks in. Or, the order you changed your task list to using the Move up or Move down options.
- Completed tasks. This order shows only tasks that you have already completed. This can be especially helpful if you need to turn in a status report.
- Due date. This order sorts the tasks by their assigned due date. Tasks without due dates appear at the bottom of the list.
Let's start by sorting the tasks by due date.
1. Sort by Due Date
Start in the main Gmail window with the task list open.
.jpg)
.jpg)
.jpg)
Click Actions in the lower left of the task list to bring up the drop-down menu.
.jpg)
.jpg)
.jpg)
Click Sort by due date to organize the tasks on the list by the date they are due. The due dates appear from the earliest date to the latest date. Tasks without due dates appear at the end of the list.
.jpg)
.jpg)
.jpg)
To change the sort order to the latest due date to the earliest due date, return to the Actions drop-down menu. Click the Reverse sort order option.
2. Sort by Completed Tasks
Start in the main Gmail window with the task
list open. The first thing we need to do is mark some tasks as completed. To mark a task as completed, click in the check box to the left of the task.
.jpg)
.jpg)
.jpg)
A check mark appears next to each completed task. The
completed task is crossed off, but still visible.
Next, click Actions in the lower left of the task list to bring up the drop-down menu.
.jpg)
.jpg)
.jpg)
Click View completed tasks. Only the completed tasks are shown.
.jpg)
.jpg)
.jpg)
3. Return to Your Sort Order
After resorting your Gmail task list in various ways, you may wish to return to your original sort order. To do this, click the Actions option to display the drop-down menu. From the drop-down menu, click View in my order.
The task list is resorted in your original sort order.
Note: Any tasks that you marked as completed earlier still appear as completed.
Step 4. How to Print or Email a Task List
You can share your Gmail task list by printing it out or by emailing it to others.
1. Print Your Gmail Task List
To print your task list, start from the main Gmail screen with your task list open. Click the Actions option to display the Actions drop-down menu.
.jpg)
.jpg)
.jpg)
Click the Print task list option. The task list appears in a separate window along with the Print dialog box.
.jpg)
.jpg)
.jpg)
Double-check that your printer settings are correct. Click OK to print your task list.
2. Email Your Gmail Task List
To email your task list, start from the main Gmail screen with your task list open. Click the Actions option to display the Actions drop-down menu.
.jpg)
.jpg)
.jpg)
Click Email task list. A new message window opens beside the task list.
.jpg)
.jpg)
.jpg)
Type the email address of person you want to send your email task list to at the top of the new message. Click the Send button in the lower left hand corner of the new message window.
3. How to Work With More than One Task List
While you can do quite a bit with the Gmail task list, one list is probably not enough. You may wish to create separate task lists for various reasons, for example you may want a separate task list for each project. You may want a personal task list.
Fortunately, in Gmail you can create more than one task list. We've already explained how to move a task to a different task list. In this step I'll show you how to:
- Create a new task list
- Switch between task lists
- How to delete a task list
Step 1. How to Create a New Gmail Task List
Start in the main Gmail window with the task list open.
.jpg)
.jpg)
.jpg)
Click the List icon in the lower right corner of the email task list. A popup menu displays.
.jpg)
.jpg)
.jpg)
Click the New list option. The New List dialog box appears.
.jpg)
.jpg)
.jpg)
Type the name of your new list in the Create a new list named field. Click the OK button. A new task list is created. Your new list is now the active email list. Your other Gmail list is not visible.
Step 2. How to Switch Between Task Lists
If you have more than one Gmail task list set up, you need to know how to switch between them.
Start with your task list open in the main Gmail window. Click the list icon in the lower right of the task list. A popup menu displays.
.jpg)
.jpg)
.jpg)
At the bottom of the popup menu you'll see a list of any email task lists. In this case, L Spencer's list and Personal Tasks.
To view one of the task lists, click on it. The Gmail task list you selected becomes the active list. You will see it in the task list. The inactive list (the list you did not select) is not visible.
Step 3. How to Delete a Gmail Task List
Occasionally a task list may outlive its usefulness. When that happens, you need to delete it.
To delete a Gmail task list, start with the task list you want to delete open in the main Gmail window. Click the list icon in the lower right of the task list. A popup menu displays.
.jpg)
.jpg)
.jpg)
Click the Delete list option on the popup menu. A system prompt appears asking you to confirm that you want to permanently delete the active Gmail task list. Click OK. The active list is deleted.
Note: Your
default list (the first list that appears when you open the Gmail task tool)
cannot be deleted. However, you can delete all other task lists.
4. How to Use Gmail Tasks with Google Calendar
The Gmail task list tool is also built into your Google calendar tool.
Step 1. Use Your Gmail Task List with Google Calendar
Open Google Calendar using the same Google
account as the account you used to create your Gmail task list. The main Google
Calendar window appears.
.jpg)
.jpg)
.jpg)
On the left of the Google Calendar, towards the middle, you'll find My calendars. The last calendar listed under My calendars is Reminders. This is where you'll find your Gmail task list.
Click Reminders and click the arrow the right to open a popup window.
.jpg)
.jpg)
.jpg)
Click the Switch to Tasks option to open the active Gmail task list on the right in your Google Calendar window. You'll also notice that task check boxes appear at the top of your Google Calendar events list.
.jpg)
.jpg)
.jpg)
Once your email task list is visible in Google calendar, you can work with it the same way you would in Gmail. You can also use the check boxes at the top of your calendar to mark a task as complete.
When you return to Gmail, any changes you made to your task list in Google Calendar will appear in your task list in Gmail.
To learn more about working with Gmail's features, explore our Gmail learning guide, the Ultimate Beginner Guide to Using Gmail. It includes tutorials on how to work with Gmail search, passwords, customizing the interface, and more. Or begin learning more with this Gmail keyboard shortcuts tutorial:


Conclusion
Gmail tasks can help you to work more productively with those important emails. Create a Gmail task lists based on tasks that arrive in your inbox.
You'll be able to stay on top of your workload. Best of all, you'll answer messages from clients and potential clients quickly. Improving your email productivity is not hard, once you know how to use Gmail tasks effectively.
Do you want to learn more about productivity? Review our series on Essential Productivity Principles.
 By
By


