

PowerPoint has the option to crop images inside of the presentation, so that you don't need a separate app to select the part of the image that matters for your presentation. Let's learn how to crop images in PowerPoint fast.
How to Quickly Crop an Image in PowerPoint
Note: Watch this short tutorial screencast or follow the quick steps below, that compliment this video.
1. Place Your Image Inside of PowerPoint
In PowerPoint, I've got a presentation here where I'll paste an image into my presentation. I like the image that I'm working with here, but I'd like to crop it so that only part of it is showing.

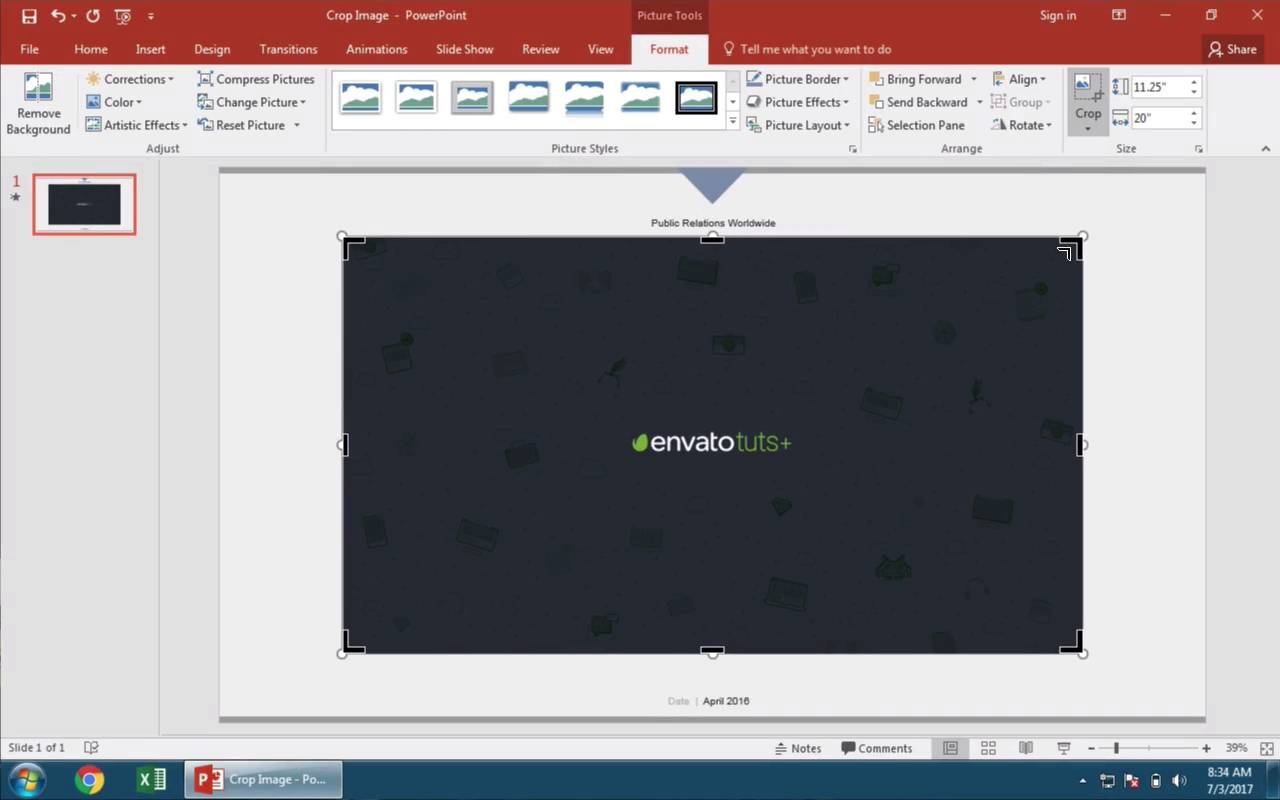
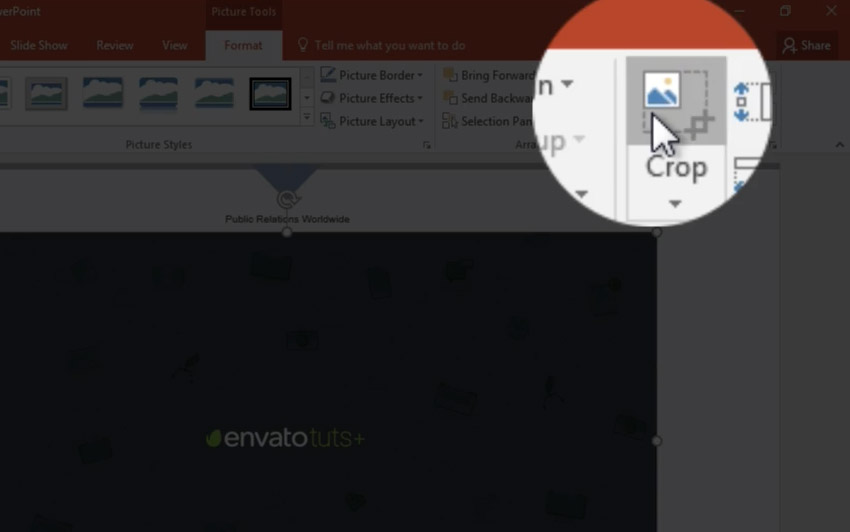
2. Select the PowerPoint Crop Tool
With the image selected, click on the Picture Tools Format menu option. To start cropping, I'll click on the Crop option here on the ribbon.
3. Crop Your Image in PowerPoint With Handles
Once you've selected this tool to crop an image, you can add these black bars that appear on the sides and corners of the image. Crop the image by grabbing one of these handles, and dragging it so that only the pixels we wanna keep are remaining.

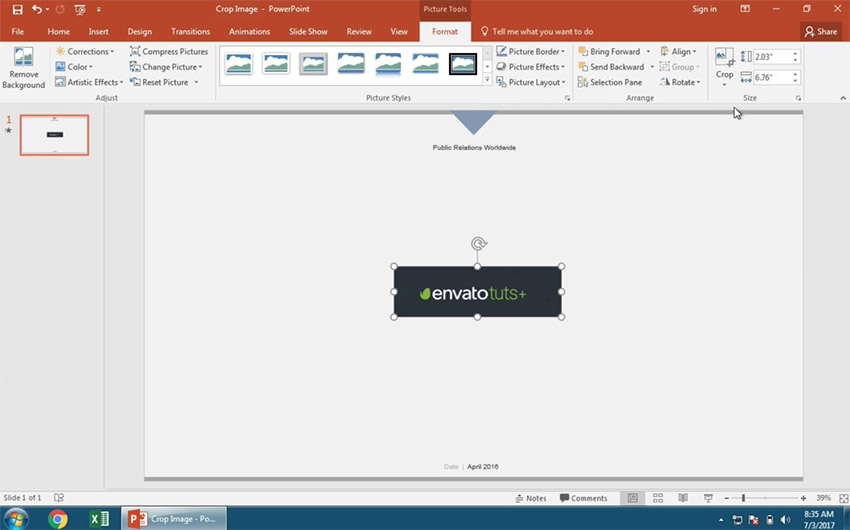
4. Lock in Your PowerPoint Image Crop
You'll see PowerPoint dim out the pixels that won't be used. To lock in the crop, I'll just click Crop on the ribbon again. Now the unused pixels are removed. We could also reenter the crop options by clicking on it again, and resize the crop area to include pixels we had already removed.
Finishing Up!
Cropping an image is a breeze in PowerPoint, so don't open up Photoshop or another app the next time you need to do it.
More Great Envato Tuts+ PowerPoint Tutorials
Learn more in our PowerPoint tutorials and quick video tutorials on Envato Tuts+. We have an assortment of PowerPoint material to help you make a great presentation:
 How to Make & Give Great PowerPoint Presentations (In 5 Simple Steps)
 How to Work With Images in PowerPoint (Complete PPT Picture Guide)
You can also find great PowerPoint presentation templates with premium designs on GraphicRiver or Envato Elements. Or, browse through our selection of the best Microsoft PowerPoint designs:


 By
By


