
If you're looking for a presentation tool, don't overlook Google Slides. This free tool, available through Google Drive, has a lot to offer. In fact, it's one of the best presentation creation tools out there.

Google Slides has all the basic slide presentation tools you need, like text styles, image tools, and custom themes. It also includes more advanced presentation tools such as the ability to publish to the web and great collaboration features.
In a short time, you can easily learn how to use each Google Slides presentation tool. In this article, we point you to step-by-step tutorials for various Google Slides features you can learn how to use right now.
This is a good article to bookmark. When you've got more time, work through all the tutorials in this article for a more complete mastery of Google Slides. These Google Slides advanced features will change the way you work!
12+ Google Slides Presentation Tools
Now, let's go through the most important Google Slides presentation tools—with tutorials you can jump into learning more, right now.
If you're new to Google Slides, get started with this tutorial. Or learn how Google Slides compares to other popular presentation apps.
 How to Use Google Slides in 2025 (Quick Start Guide)
 PowerPoint vs. Keynote vs. Google Slides: Best Presentation Software?
1. Add Text and Bullet Points
With a free software tool, you'd expect limited text formatting tools. With Google Slides, you get a full complement of text formatting tools. Here's a look at the Google Slides formatting tools:
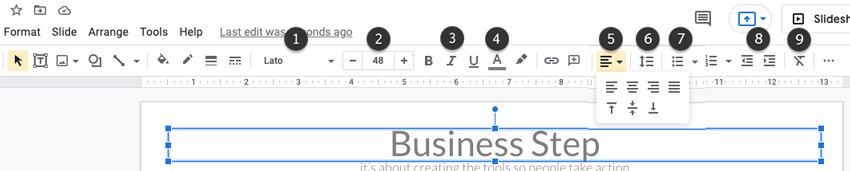
Each number below corresponds to an icon in the illustration above:
- Font. Choose a font for your text.
- Font size. Define the text size.
- Text effects. Bold, italicize, or underline your text.
- Font color. Select a font color.
- Text alignment. Define horizontal text alignment as left, center, right, or justified.
- Line spacing. Set up line spacing between lines of text. This option also lets you add space before or after a paragraph and define custom spacing.
- Lists. Define various types of numbered and bulleted lists.
- Indents. Decrease or increase text indents.
- Clear formatting. Clear the current text formatting.
These tools are more than enough to command text in your Google Slides presentation.
2. Add Images and Backgrounds
Google tools that work with images help you create amazing slides. By adding your own images and backgrounds, you can wow any audience. These Google Slides features are easy to use. Add them to your design workflow.
To add an image in Google Slides, go to the Insert > Image menu. Here, there are several options. One is the Upload from Computer feature shown below. You can import an image file stored on your computer and add it to Google presentation software.
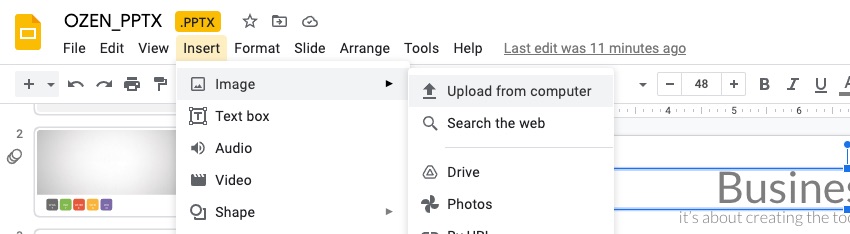
Other options include importing from a URL, your stored Google Photos, and more. These Google tools let you add slide backgrounds too.
The best place to find images for your Google Slides deck is Envato Elements. Elements includes a library of millions of stunning stock photos. These are royalty-free, and you can download unlimited photos as an Elements subscriber.
3. Change Google Slides Presentation Themes
How your Google Slides slideshow looks determines what people think of it...and by extension, what they think of your business.
With Google Slides, you're not locked into a single look for your presentation. Google Slides includes some basic themes, but for more graphic layouts and pro features you may want to use a Premium template.

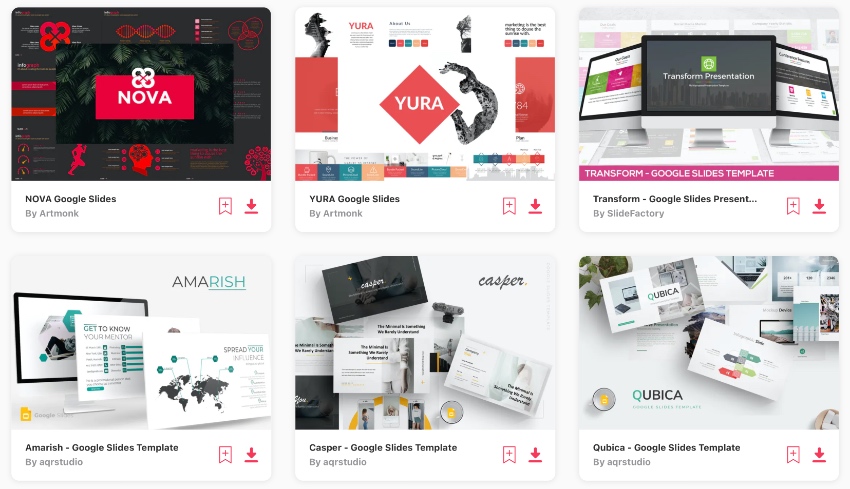
Choose from a wide variety of professional Google Slides templates from talented designers on Envato's GraphicRiver marketplace. Or browse through our selection of the best:

To make your presentation stand out, learn to use the Slide > Change Theme menu option to apply a unique professional theme to your slideshow. You'll find step-by-step instructions for changing Google Slides themes here:
.jpeg)
4. Create Shareable Presentations Quickly
As a web-based app, Google presentation software helps you share slides with the world. Users won’t have to install apps on their computers to view presentations.
But sometimes, you’ll want to share copies of your presentation digitally, or even print them out. It’s important to preserve your designs while making them accessible to all.
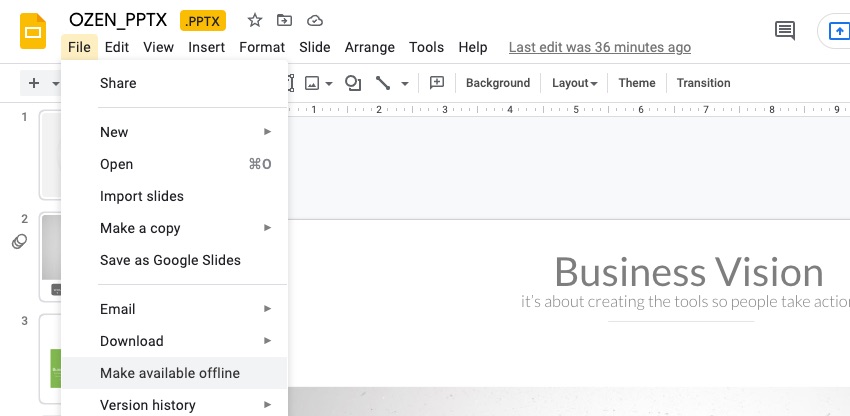
Google Slides advanced features for exports help you do this. Find them on the File > Download menu. There, you’ll have several options to download and export your Google Slides file.
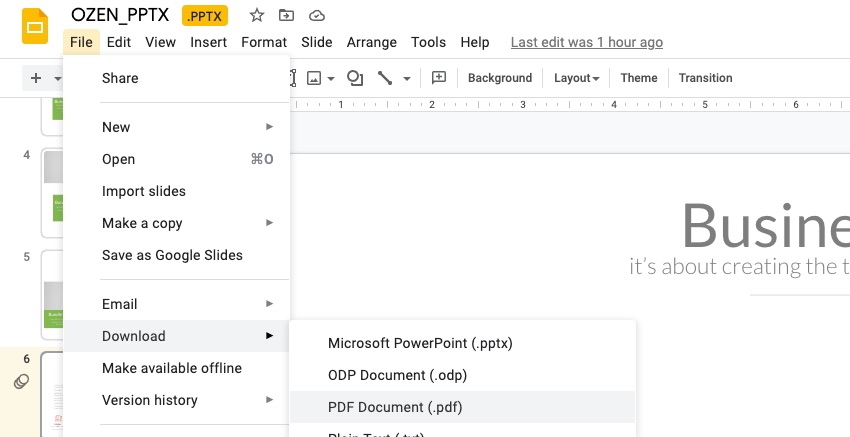
Need to share in PowerPoint? Choose the Microsoft PowerPoint (.pptx) option at the top. Another great choice is the PDF Document (.pdf) feature. PDF files are easy to share and can be viewed on nearly any device. If you need versatility and maximum reach, PDF is your best choice.

5. Create Google Slides Layouts
Not only does changing the theme of your presentation help to engage your audience, adding varying slide layouts also adds interest. Google Slides allows you to change existing slide layouts through the Themes tool. Open this with the Slide > Change Theme option.
Here's what this looks like in the Ozen template:
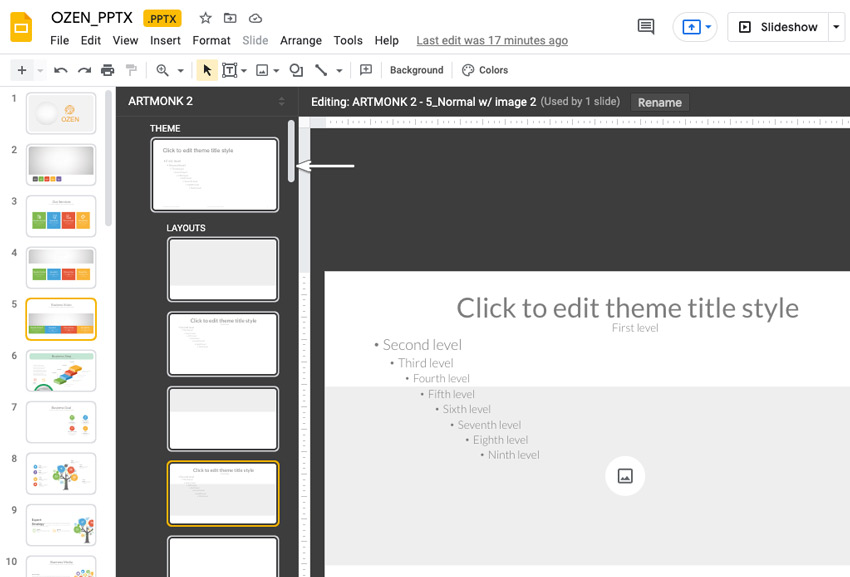
All the slides in your template are based on the Theme. The Theme controls general stylistic options, while Layouts are arrangements that inherit the style in the theme. You can alter either of these to affect all slides in your deck.
6. Learn to Use Google Slides Templates
Graphic templates are a cool Google Slides tool that you should learn to make use of. They'll save you a lot of time.
Let's look at an example of how convenient using a template can be. Ordinarily, making a timeline in Google Slides would involve a lot of online "drawing" on your part. While Google Slides does offer a Shape and a Line tool, that doesn't mean you should use it for yourself. Professional templates already have these Google Slides parts added for you.
But premium templates from Envato Elements offer a much better option. These designs include infographics built in. Rather than spending forever designing your own, you can work with existing slides.
Check out the slide example below from the Timeline Google Slides Templates.

Again, these layouts are pre-built. You can add your key dates and milestones in seconds. All the complex graphic work is done for you, thanks to the expert template designer.
7. Use Collaboration Tools
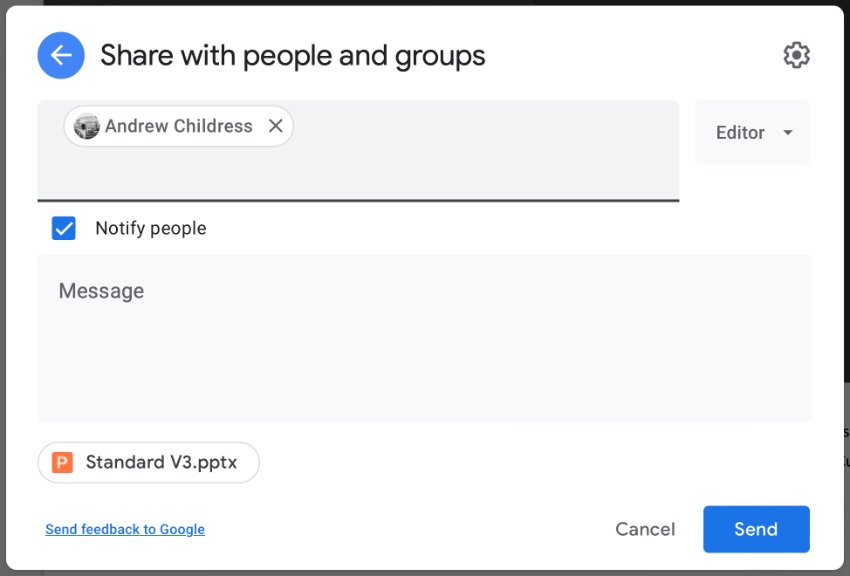
One of the strengths of Google Slides is the ability to collaborate with others. This tool is an online-first app built for the modern web, so you can easily share with Google Slides' collaboration tools.
Depending on what rights you give your collaborator, they can view, edit, or comment on your presentation:
Explore the Google Slides collaboration tools further in Tip 9 of this tutorial:
8. Use Google Slides Special Effects
You might not expect it from a free tool like Google Slides, but it certainly offers professional slideshow special effects. Google Slides special effects rival those offered by pricier software tools.
Besides the transition effects, Google Slides also offers you the opportunity to animate specific objects on an individual slide. Choose from 15 different animation effects.
To explore the Google Slides special effects tools in greater depth, refer to this this tutorial:
.jpg)
9. Add YouTube Videos
Multimedia is everywhere these days, and slideshow presentations are no different. Often, to really capture and hold your audience's attention you need to add video.
With Google Slides, add your choice of YouTube or other video to your presentation using the Insert > Video menu option. Here's the Insert Video dialog box:
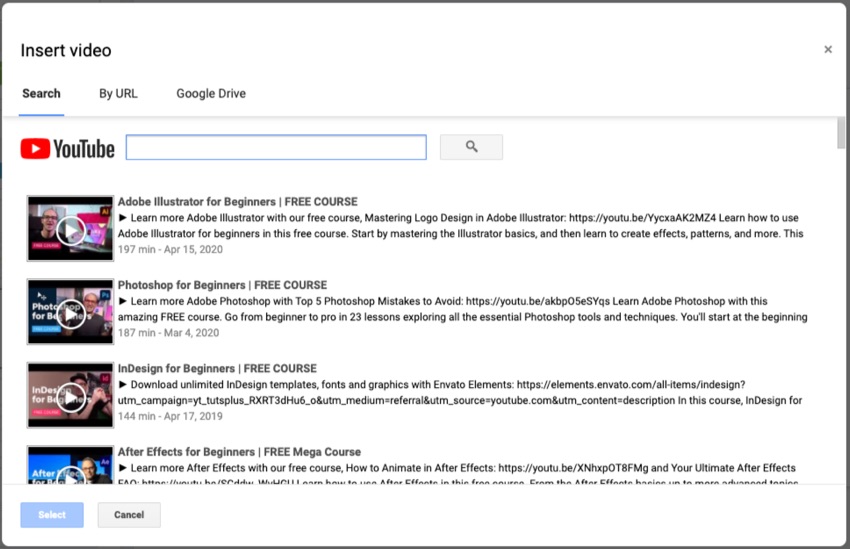
You can search for a video directly inside this window or paste a URL for a video you found while searching YouTube.
For the complete scoop on how to add video to your professional Google Slides presentation, review this tutorial:
.jpg)
10. Publish to the Web
Because Google Slides is an Internet-based tool, it includes excellent online publishing options. This is convenient if you need to use your Google Slides presentation for a webinar or if you want to reach a remote audience.
Google Slides even allows you to define how long each slide appears on the screen, plus allows you to set it to loop.
Learn more about how to publish a Google Slides presentation online:
.jpg)
11. Use Google Tools to Change Slide Shapes
When you work with Google Slides’ advanced features, think of how they can help you.
Slide aspect ratios control the shape and size of your slides. On the File > Page Setup menu, you can change these on the dropdown.
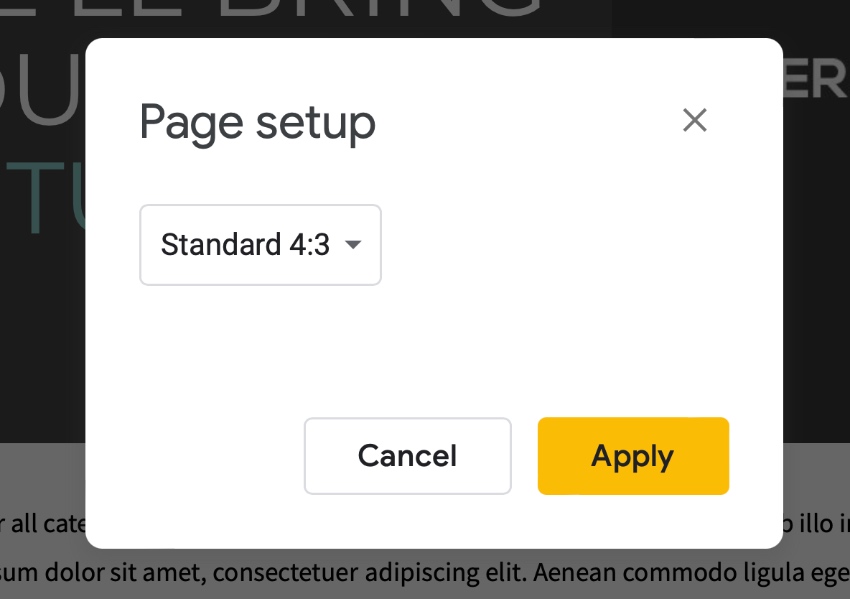
Keep the following in mind as you decide:
- Widescreen 16:9 is common to most laptops, displays, and newer monitors.
- Standard 4:3 is the more square layout still used by many projectors.
- Widescreen 16:10 is used by many Apple laptops and other gaming computers.
Choosing the right size here helps your presentation look its very best.
12. Use Google Slides Offline
Don't let the fact the Google Slides is an online software tool frighten you. If you know how, you can set Google Slides up so that you can work offline.
Use the File > Make available offline option to access your file, even when you aren't connected.
This feature comes in handy if your Internet is down or if you travel to an area without an Internet connection. When you come back online, your offline presentation automatically syncs with the online version. It's one of the handiest Google Slides advanced features to keep you productive.
12. Run Google Slides Remotely
Did you ever wish you could use your smartphone or tablet as a remote for a larger screen (such a projector screen or a television)? If you travel and give presentations, learning how to do this will make your life easier.
With the right tools, you can run Google Slides remotely from an Android or IOS device. To do it, you'll need:
- an Internet connection
- Apple TV if using an IOS device
- Chromecast device if using an Android device
- Google Slides app
Turn to this Envato Tuts+ tutorial, for detailed instructions on how to run Google Slides remotely:

13. Share Confidently With Speaker Notes
Some Google Slides features are designed to help you present with more confidence. One of the simplest and best is the Speaker Notes feature.
Activate it by launching the View tab, then choosing Show Speaker Notes. You’ll see a box below your slides. In it, you can type notes. These won’t be seen by your audience, but they’ll be visible to you when you share.
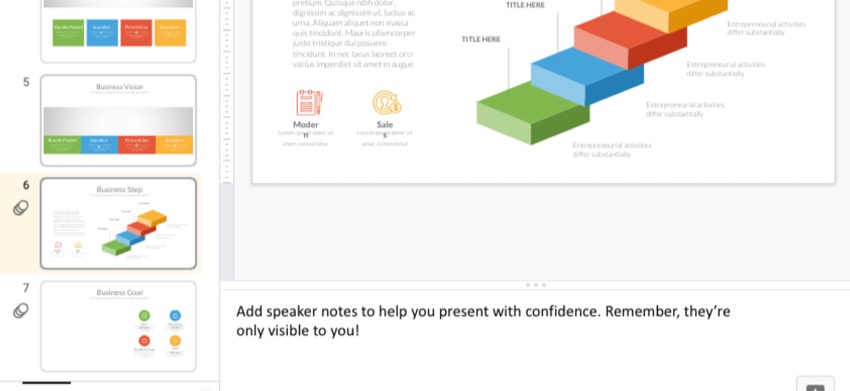
This way, you can leave yourself a handy guide to stay focused as you present. It avoids the awkward act of reading slides, or from a sheet of notes as you're speaking.
.jpg)
Envato Elements (Design Without Limits)
Need to make the most of Google Slides’ advanced features? Premium templates are the answer. Envato Elements is the best place to find them.
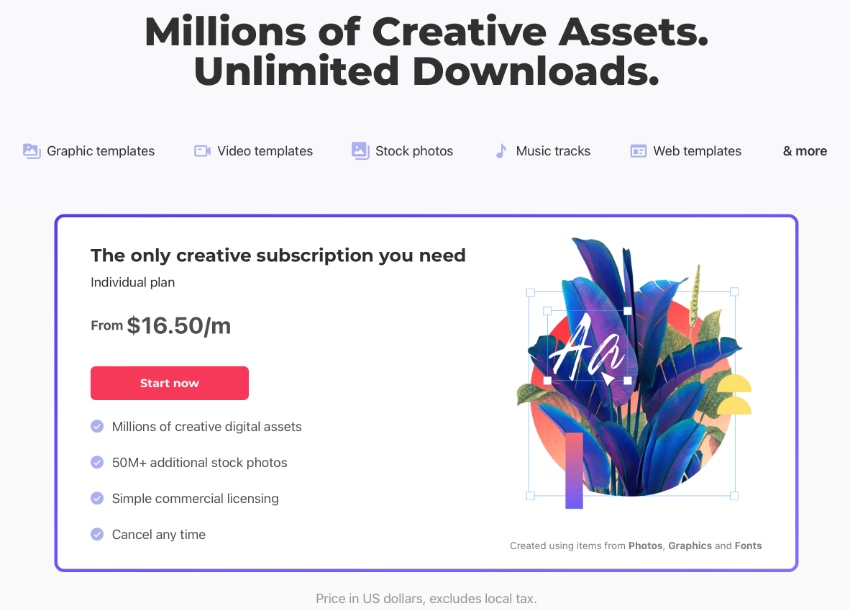
For a flat monthly rate, you get unlimited access to thousands of slide templates. And that isn’t all. Elements also includes music, stock photos, and much more. All these assets can be used to craft stunning Google Slides designs fast.
What are you waiting for? Browse the vast (updated daily) library and join today!. Unlimited downloads offer unlimited opportunities. You can craft unforgettable Google Slides presentations in no time. You’ll appreciate the time savings. Your audiences will appreciate the stunning styles.
More Google Presentation Software Templates (For Amazing 2022 Designs)
On Envato Elements, you can find amazing Google Slides templates for all your projects. These help you design and build presentations that audiences will never forget. And they save you precious time by taking care of the tedious design work for you.
But with thousands of options, you may be looking for a head start. To help, we’ve found the very best Google Slides templates available now on Envato Elements.
 25 Creative Google Slides Presentation Templates (Aesthetic Pretty Designs 2025)
 33 Best Google Slides Templates for Business Presentations in 2025
 20 Best Google Slides Presentation Themes (Premium Templates to Download in 2025)
Use These Google Slides Advanced Features Today
Should you be using Google Slides to create your presentations? A comparison between Google Slides and other apps shows that Slides offers its own advantages. And thanks to this tutorial, you now know many of the best Google tools.
Google Slides is a web-based tool that's ideal for collaboration. Google's presentation software also has advanced features for professional purposes. When you consider that the Google Slides presentation tool is also free, it becomes an excellent option.
Start learning how to use Google Slides presentation tools right now. Study our step-by-step guides, then add these Google Slides advanced features to get the most from the app.
Editorial Note: This post was originally published in October of 2017. It's been updated by Andrew Childress to ensure that the information is relevant and up to date.
 By
By


