
 Lessons: 17Length: 39 minutes
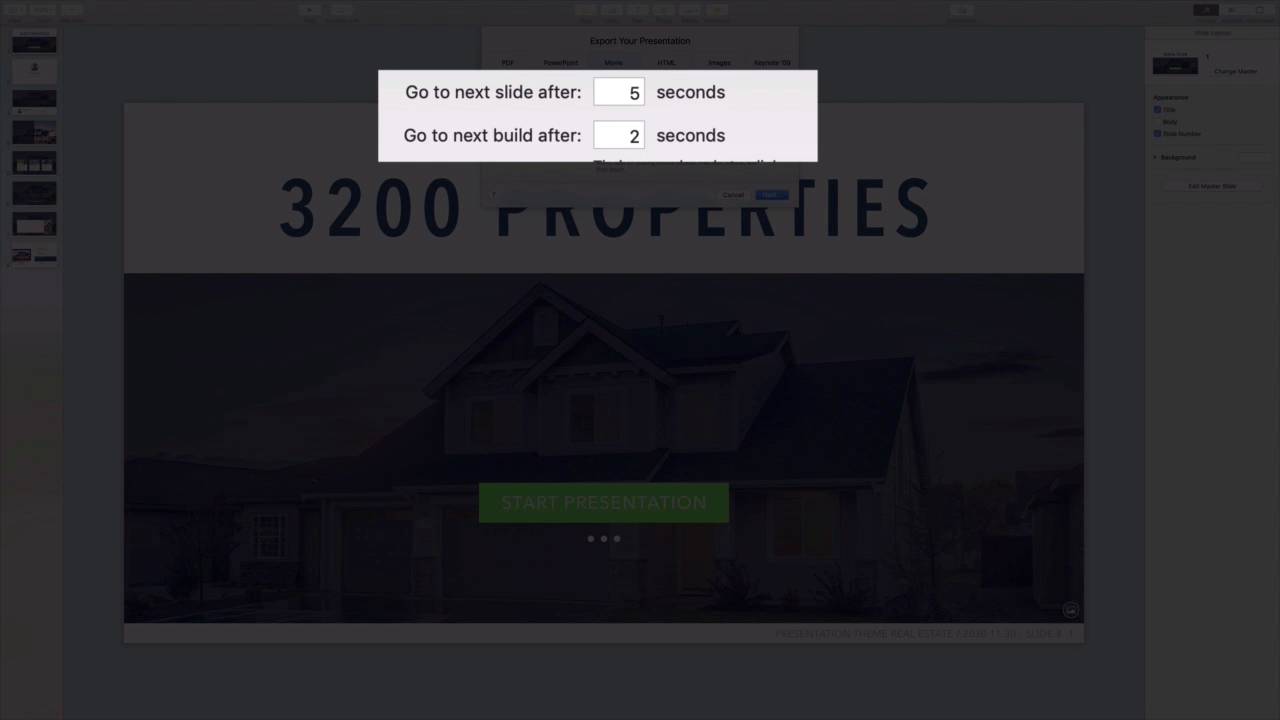
- Overview
- Transcript
3.4 How to Make a Video With Apple Keynote
Not everyone has Keynote installed on their computer. Learn to export your presentation as a video file to make it easy to share or to upload to video sharing sites.
1.Introduction
1.1Introduction00:58
2.Working With Templates
2.1How to Choose a Keynote Template03:02
2.2How to Edit a Keynote Slide Layout02:54
2.3How to Edit Keynote Slide Masters02:37
3.Working With Multimedia and Animations
3.1How to Add Music to Apple Keynote02:53
3.2How to Add Images in Apple Keynote03:14
3.3How to Use Apple Keynote Magic Move01:41
3.4How to Make a Video With Apple Keynote01:58
3.5How to Add a Background Image in Apple Keynote03:18
3.6How to Use Keynote Animations02:26
4.Building Charts, Infographics, and Custom Visuals
4.1How to Edit a Keynote Chart02:23
4.2How to Edit Keynote Infographics01:55
4.3How to Create Device Mockups in Apple Keynote02:22
4.4How to Add and Use Custom Fonts in Apple Keynote02:38
5.Presenting With Confidence in Keynote
5.1How to Add and Use Presenter Notes in Apple Keynote02:14
5.2How to Broadcast Your Presentation With Keynote Live01:55
6.Conclusion
6.1Wrapping Up00:39
3.4 How to Make a Video With Apple Keynote
I've finished building a presentation here, and I want to email it to colleagues around the world. For this, I think it would be best to send them a video instead of the raw presentation file. This makes it more accessible. And it also keeps others from being able to edit and manipulate the slides. Overall, this provides better control over our finished Keynote presentation. To export my presentation as a video, I'll come up here to the File tab in the upper left corner. As you can see, Keynote has an export tool menu here on the drop down. I'll go ahead and click on it. A list of options will appear now. You'll see PDF, PowerPoint, Images and more. The option I want for video is QuickTime, a widely available cross platform video format, I'll go ahead and choose it. A menu will pop up called export your presentation. On it, you'll have a few options to choose how you want your presentation video to play back. Since we're exporting rather than screen recording the slides, the default self playing option is best, so I'll leave that unchanged. The next option is related to the slide timings. In other words how long each slide stays on screen. This upper box relates to the full slide duration, while the second adjust how long each item takes to animate on screen. A build is an instance where you would click to introduce new content if you were presenting it in person. Last up, we can adjust the video size and resolution in this drop-down at the bottom. For me, I want to export at 1280 by 800, so I'll select custom. In the boxes, I'll enter in those values to set up my export. And finally, I can choose from three compression options to reduce file size while retaining quality. The default H.264 should work great. When I'm ready, I'll go ahead and click Next. Keynote will give a chance to name my video file and choose where to store it on my computer. I'll enter a name for the video here. I can also add a couple of optional tags, which are basically keywords that help make files easier to locate on my Mac. Finally, I can choose a folder to save to, and then click Export. Keynote will go to work creating a video file for my slides as you're seeing here. When it's finished, I'll jump over and play a preview. It looks great, and it will be easier for everyone to access on their personal devices. Thanks for watching.


